

From your installed system you need to use a Terminal enter the command:
(where you will have to write your user password blindly) as a admin user or:
as root user from a Terminal.
A possible output might be:
Unidades = sectores de 1 * 512 = 512 bytes
Tamaño de sector (lógico / físico): 512 bytes / 512 bytes
Tamaño E/S (mínimo/óptimo): 512 bytes / 512 bytes
Identificador del disco: 0x000221dd
Dispositivo Inicio Comienzo Fin Bloques Id Sistema
/dev/sda1 * 2048 41940991 20969472 83 Linux
In most of the cases you will see that you have a Linux system partition sda5, sda4, or whatever sdaX. That means that your hard disk (as it’s seen above) it’s sda.
In any case we recommend to check hard disk size next to Disk /dev/sdX at the output’s beginning so that you make sure that you select the exact hard disk that boots initially in your machine.
Now we are going to install grub back to the MBR, which it is what most people to do.
In the next command you will need to replace sda with your hard disk.
Either you run:
as root user from a Terminal.
The most probable output for the command is:
Installation finished. No error reported.
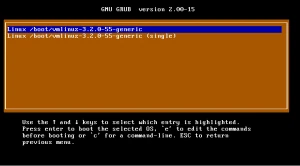
That means that the installation was successful. When you reboot Grub menu should be alive again.
Installing the ClamAV using a Terminal enter the following commands.
Now you can:
1. Stop freshclam service by entering
2. Run freshclam command by entering
3. Start freshclam service by entering
Start freshclam service
Ensure freshclam service is active.
Run this command to start the freshclam service.
Run this command to start the freshclam service at boot.
